
Table of Contents
- What is an Open Cast On?
- The Uses of an Open Cast On.
- The Process:
- Step 1. Prepare the tension unit.
- Adjust tension for yarn thickness.
- Step 2. Prepare the needles for an open cast on.
- Move the alternating needles back to the non-working position with a 1/1 needle pusher.
- Step 3. Prepare the carriage for the open cast on.
- Step 4. Cast the yarn on the needles using an open cast on.
- Step 5. Prepare needles for knitting.
- Step 6. Move the carriage from left to right and continue knitting.
- Step 7. Remove the knitting while holding the cast-on comb.
What is an Open Cast On?
Open cast on is the type of cast on that produces unfastened stitches that will unravel whenever possible. This type of stitch is also known as live or open stitch. Open cast on is also known as provisional or invisible cast on.
The Uses of an Open Cast On.
So, open, invisible, or provisional cast on creates live or open stitches. This cast on has many uses.
What is the purpose of an open cast on?
- It provides an invisible seam
After you are done knitting one part of your project with an open cast on, you then bind it off. Next, you can load the live stitches back onto the machine with the knitting turned upside-down. The intent is to start knitting in the opposite direction. Thus, you create an invisible seam with an intriguing pattern radiating in two directions.
By doing that, you can knit a scarf in two directions starting from the middle. Or, you can make anything that folds. For example, a stocking cap or socks, a bag or purse, toys, a double-knit fabric, and so on.
You can also use these open stitches to hem a garment using a ribbing machine or by hand.
- It allows making a disposable anchor
An anchor is a piece of provisional fabric knitted from waste yarn. And it is used to attach permanent yarn. Later, the anchor is removed to give a very neat and professional appeal to the remaining edge.
This method is described in detail in the Blue Cat tutorial about an e-wrap cast on with an anchor.
- It saves time for making a temporary sample swatch
One example is making a new pattern and needing to calculate the number of stitches and rows for the size. Another example is when you are unsure if you have enough yarn for a project. In both cases, you can quickly load the needles with an open cast on. Then, knit a sample swatch and cast it off. After you block it you can measure the resulting piece.
These are just a few applications of the provisional cast on. I am sure, you can come up with many other creative uses!
So, how do you do an open cast on? Let’s get started.
The Process:
This tutorial explains step by step how to do an open cast on. Use the outline above if you know how to do it and only need to review the method. It recaps every step of the process. You can click on each step to see the detailed explanation and photos.
Do you want to see the entire process? Then, read on!
Step 1. Prepare the tension unit.
Thread the yarn through the tension unit.
Thread the yarn according to your machine user manual. The diagram below demonstrates the steps for my Knitking machine. Knitking is very similar to Brother.
- Thread the yarn through the rear yarn guide.
- Pass it between the disks from the back.
- Thread through the front yarn guide.
- Thread into the take-up spring eyelet.
- Clip it in the yarn clip.

Adjust tension for yarn thickness.
Usually, the tension is higher for thick yarn and lower for fine yarn. The medium-weight yarn tension is somewhere in the middle. Adjust the yarn tension. Please refer to your machine manual for guidance.

Upon setting the tension, you need to prepare the needles for an open cast on.
Step 2. Prepare the needles for an open cast on.
A Technical Note about Needles and their Positions (for Beginners).
- The Needles . . .
A knitting machine needle has five parts: hook, latch, stem, butt, and shank (please see the diagram below).

The folded knobs you see closer to the middle of the photo below are the butts. You will be using them to push the needles into their positions. It will become more clear very soon.

- . . . and the needle positions
Modern knitting machines have four positions:
- Non-working position (NWP) does not knit.
- Working position (WP) knits stocking stitch.
- Upper working position (UWP) is used for patterns.
- Holding position (HP) does not knit when the holding lever is on.
Different models used different letter denominations for the positions.
Knitmaster, Empisal, Silver, Singer, and Studio, use A, B, C, D, respectively.
Brother (KH830 and higher) and Knitking use A, B, D, and E, respectively.
Only two positions are used for an open cast on — working and non-working positions.
Move selected needles to the working position (B) and align them using the carriage.
Chose approximately 30 needles to use for knitting your practice swatch. They are referred to as working needles. Use the flat side of the needle pusher and the needle butts to move them one step forward into the working position.
The holding cam lever on the carriage is in the normal position (N on Brother/Knitking or triangle on Singer/Studio).


Next, run the carriage across the needles a couple of times to align them. The position of the carriage relative to the needles is not important at this point. It can be on the right or left side of the working needles.

Move the alternating needles back to the non-working position with a 1/1 needle pusher.
The next step is to move every other needle back to the non-working position (A).

Blue Cat is holding the needle pusher to demonstrate how it moves the needles.

The picture below shows the selected needles alternating between the working (B) and non-working (A) positions.

Align the needles by moving the carriage with the holding cam lever in the normal position. Leave the carriage on the right.
At this point, the needles are in place and the holding cam lever stays in the normal position. The next step is to move the carriage across the needles a few times. This time, you need to park the carriage on the right of the working needles.
Step 3. Prepare the carriage for the open cast on.
The carriage and the needles are in position for the cast on. The cam lever is in the normal position. The final step is to thread the carriage.
Thread the yarn through yarn feeder A of the carriage
Now you will need to thread the yarn through the carriage. It is the carriage used for a stocking stitch.
How to thread the yarn through the feeder of the carriage (for Beginners).
- Open the yarn feeder of the carriage by pushing the lever to the left.
- Remove the yarn from the yarn clip on the tension unit.
- Take the yarn through the yarn feeder A of the carriage.
- Move the lever back to close the yarn feeder while holding the yarn in the left hand.
Voila! You are ready! But don’t let go of the yarn just yet!

Step 4. Cast the yarn on the needles using an open cast on.
Move the carriage from right to left until you hear a click.
Still holding the yarn with your left hand, move the carriage from right to left across all working needles. You can let go of the yarn when you feel the needles catch it.
After the carriage has been moved to the left, the needles in the working position should have the yarn wrapped around them as shown in the photo below.

This is what it looks like from a different angle:

Step 5. Prepare needles for knitting.
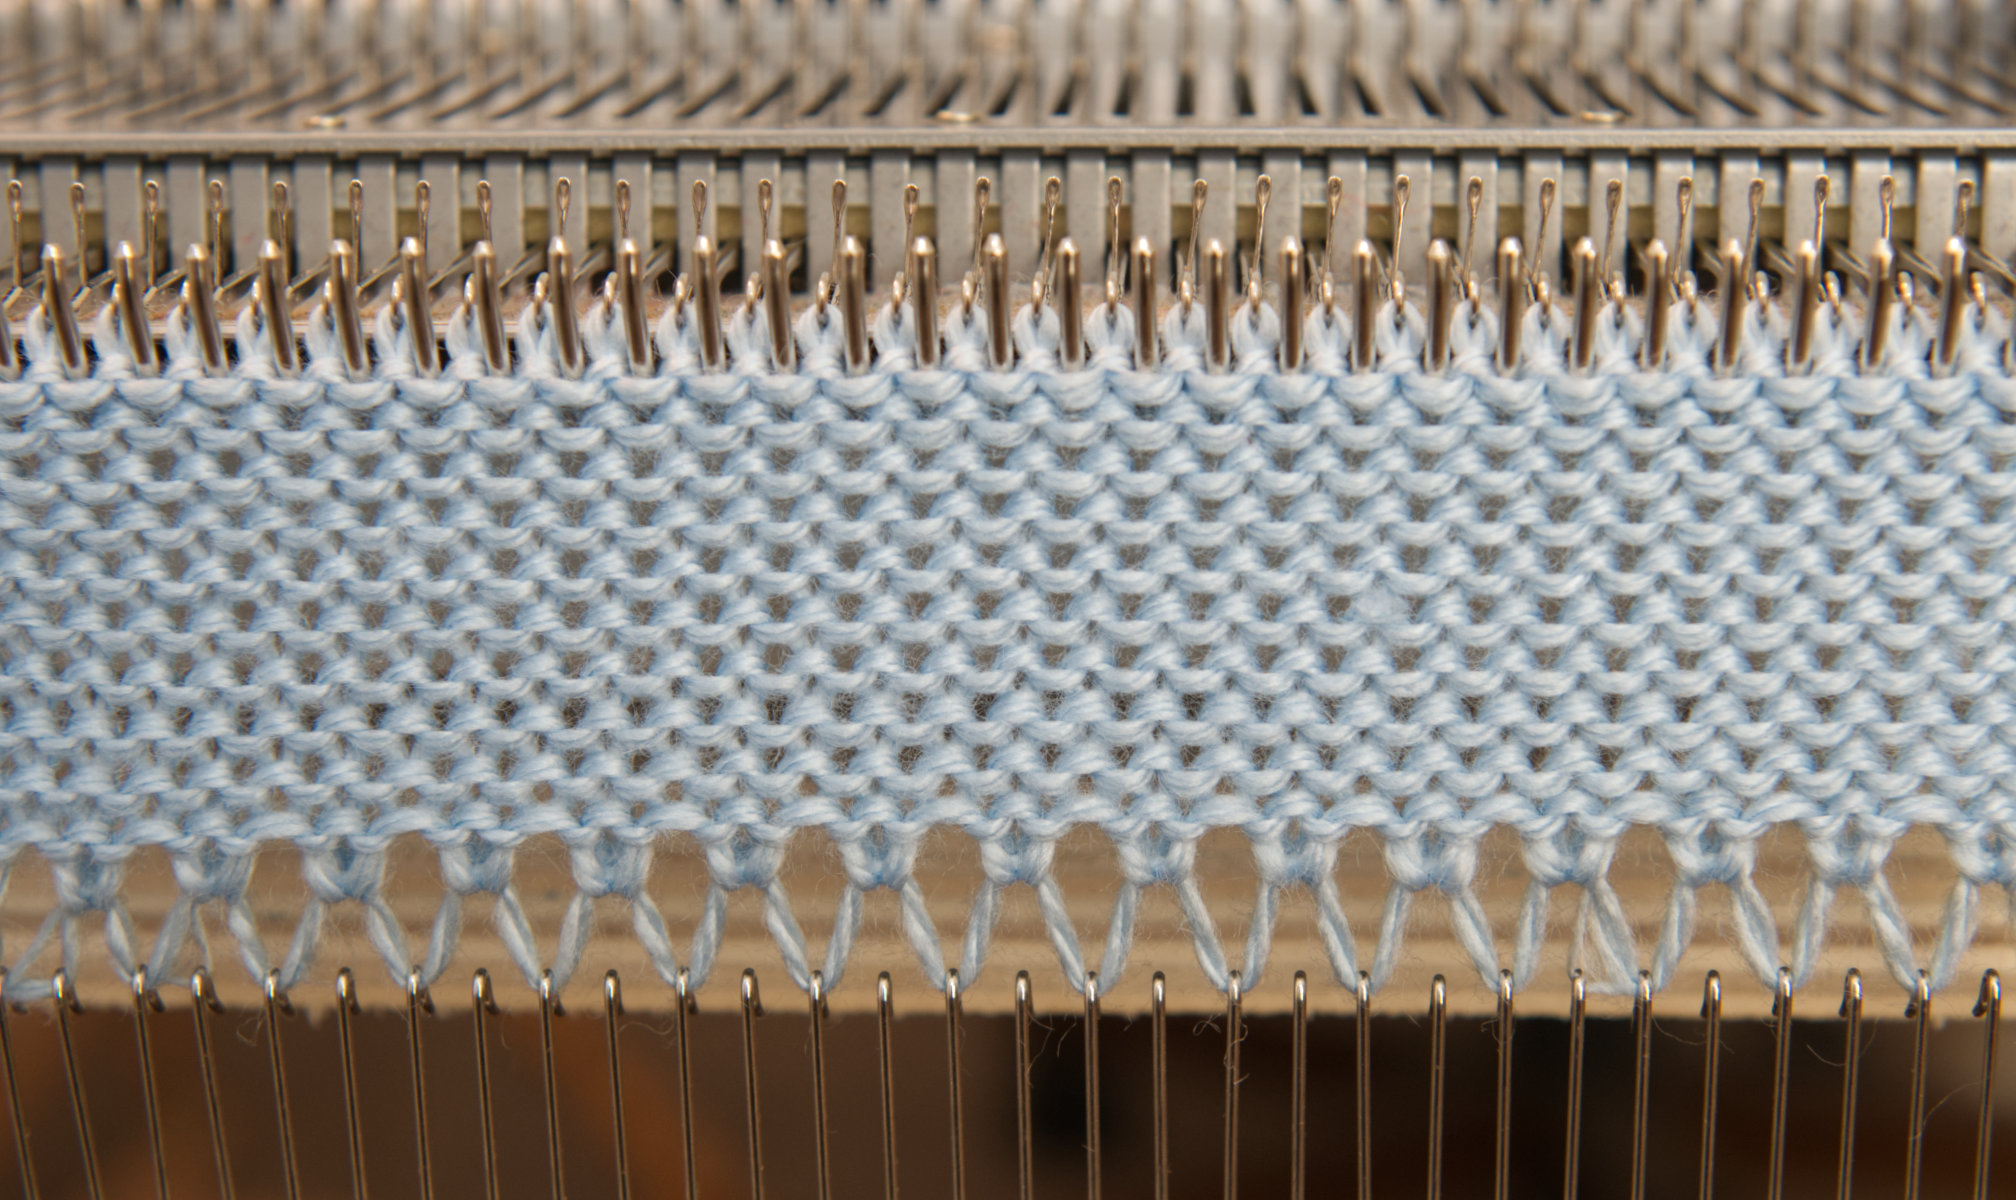
Attach a cast-on comb to the loops.
Now, we use a cast-on comb to add tension to the loops.

I chose the short cast-on comb for this small exercise.

Hook the cast-on comb over the loops and pull it down lightly.

Make sure that the working yarn connected to the carriage (on the left) is not attached to the cast-on comb.

You should be able to pull the working yarn toward you as shown in the photo below.

Push the remaining needles from the non-working to the working position.
There is one more step to take before the machine is prepared for knitting. Now, we need to use the flat side of the needle pusher to return the needles from position A back to position B.

Step 6. Move the carriage from left to right and continue knitting.
Move the carriage to the right clearing the knitting before you move it back in the other direction. You will hear a clicking sound at the end of each row.

Now, we are ready to knit our project. Move the carriage back and forth making sure that the carriage clears the rows. But don’t move the carriage too far passed the knitting.

Step 7. Remove the knitting while holding the cast-on comb.
After a few rows are knitted, you will see the purl side of the project facing you. You can remove your knitting when you are satisfied with the number of rows you’ve made. This is called cast-off.
To cast off, remove the yarn from the yarn feeder A of the carriage. Push the yarn feeder lever to the left and move the yarn downward. And finally, move the empty carriage over the work to the other side.* When you do that, your knitting piece will disconnect from the needles.
*Important: To prevent your knitting from falling, make sure that you hold the cast-on comb as you move the carriage.


Congratulations! You have completed the Open Cast On Tutorial!