
Deciding on the Decorative Pillow
Mastering how to weave had been a dream of mine for a long time. A few weeks ago, I finally took my first weaving lesson. After finishing my study practice, and mastering a few skills and designs on my own, I decided to create a sham sari silk pillow.
A couple of years ago, I was on a shopping spree for bright and colorful Indian saris. Some have very intricate prints, and some are more simple and elegant. I use them for tunics, curtains, ribbons, and various decorative items. When you purchase things on line, however, you don’t always get what you think you are buying. So, two of the saris I bought looked a little different in real life. The colors weren’t exactly what I expected, and the fabric had very little drape. Drape, by the way, is a quality of fabric describing how fluid or rigid the fabric is. The more drape the more fluid and silky the fabric. Well, these saris didn’t have the desired drape for my purposes. See the picture of the two saris below.

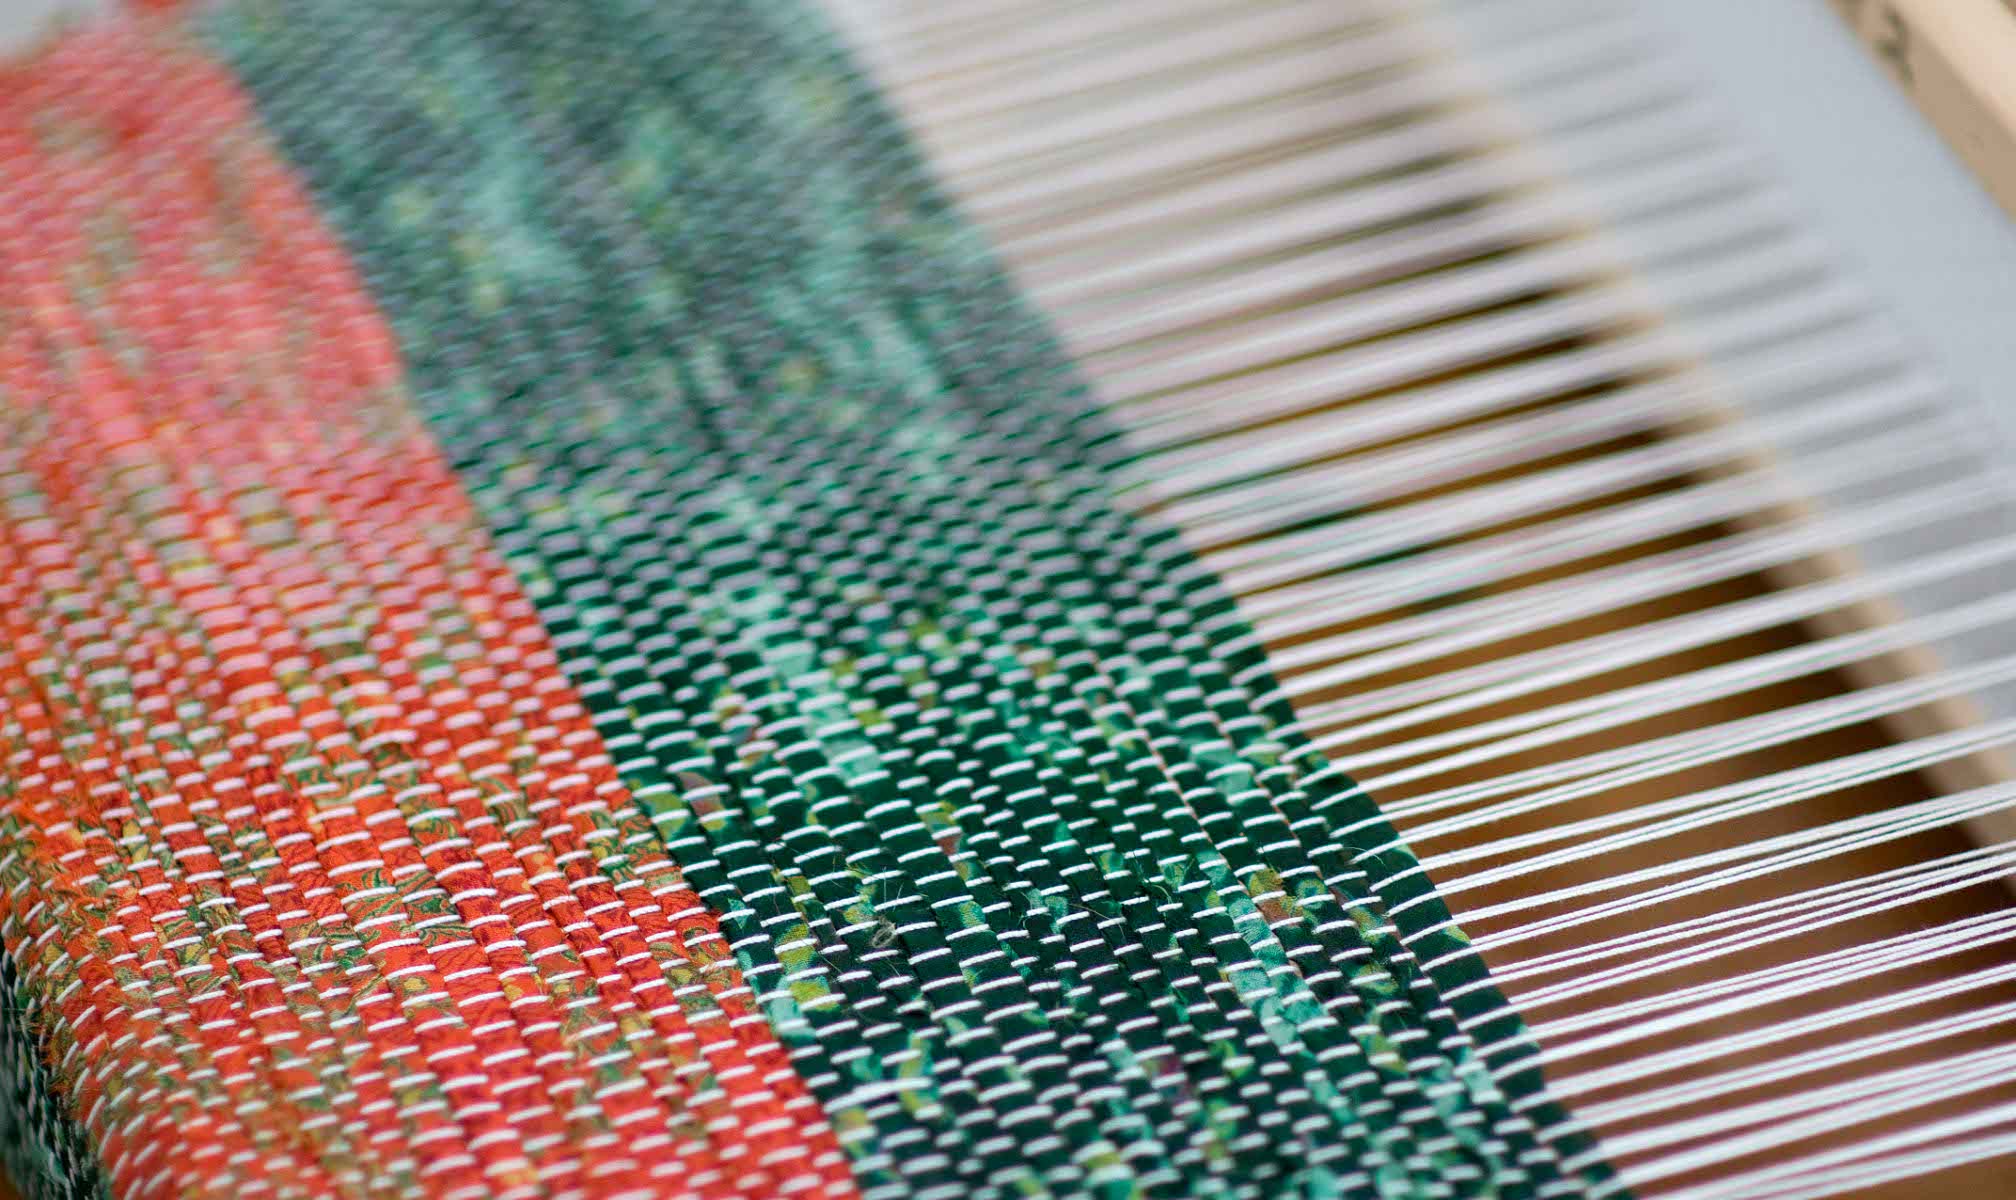
Each sari is about five yards long. I decided to cut them into 3/4 inch-wide strips lengthwise, and use them for as a weft in my weaving project. Woven fabric has two basic components, warp and weft. Warp is a longitudinal yarn/thread, and weft is made of crosswise fibers. I decided to use mercerized cotton for my stationary warp fibers.
The colors of the saris are very bright and saturated. I needed to dilute them with something light and neutral. White cotton was my color of choice in this case.
I put the mercerized cotton warp on the loom and started weaving with the silk sari strips in alternating colors.

This is what I fashioned for the decorative top of my silk sari pillow.

Although, I have introduced a good amount of white in this colorful combination, I felt that I still didn’t have enough light-colored neutrals. So, I decided to break the pattern with an off-white cotton lace. The photo below shows the close up of the lace embellishments stitched to the silk. You will see later how the stitching was done.

The silk sham is lined with another fabric for added durability and a sleek luxurious feel. The material I found is a very smooth and silky liner fabric.
This liner, by the way, is an example of a fabric with a very good drape. See how smoothly it folds without creases or crinkles?

Weaving this sari silk changed its texture altogether. It became very soft and warm to touch. The drape was greatly improved. It feels almost like a knitted silk fabric.
Because the sari silk top and the liner are both very sleek and flowing, they float easily past each other when being handled. I had to use this special contraption called walking presser foot. It is so complicated that it comes with its own user manual.

This presser foot is designed specifically for quilting or sewing multiple layers of very sleek fabrics. It advances all layers of fabric equally with each stitch. Sorry for getting too technical here. I just wanted you to know that this lace adornment was handled very slowly and with surgical precision. The liner fabric was being quilted to the sham at the same time. It is on the bottom of the assembly and not seen in the picture below.

You can see the back side of the sham in the photo below. An unfinished matching sham is in the background.

Below is the finished and lined top part of the pillowcase.

The type of weave and the liner had transformed very crispy saris into a very soft and luxurious piece.

I am happy with my work and with the result. The next step is to make a matching sham to complete the decorative pillow.

Move on to Part II of my sari silk pillow project to see the final result.