
How I made my Wool Lace Tunic from Start to Finish
Making things from scratch is so rewarding! So, when I crafted my lace tunic a few years ago, I intended experience every aspect of garment making. It wasn’t truly a farm-to-fashion journey quite yet because I didn’t really see the sheep that produced the wool. In fact, the roving I purchased was an import from England.
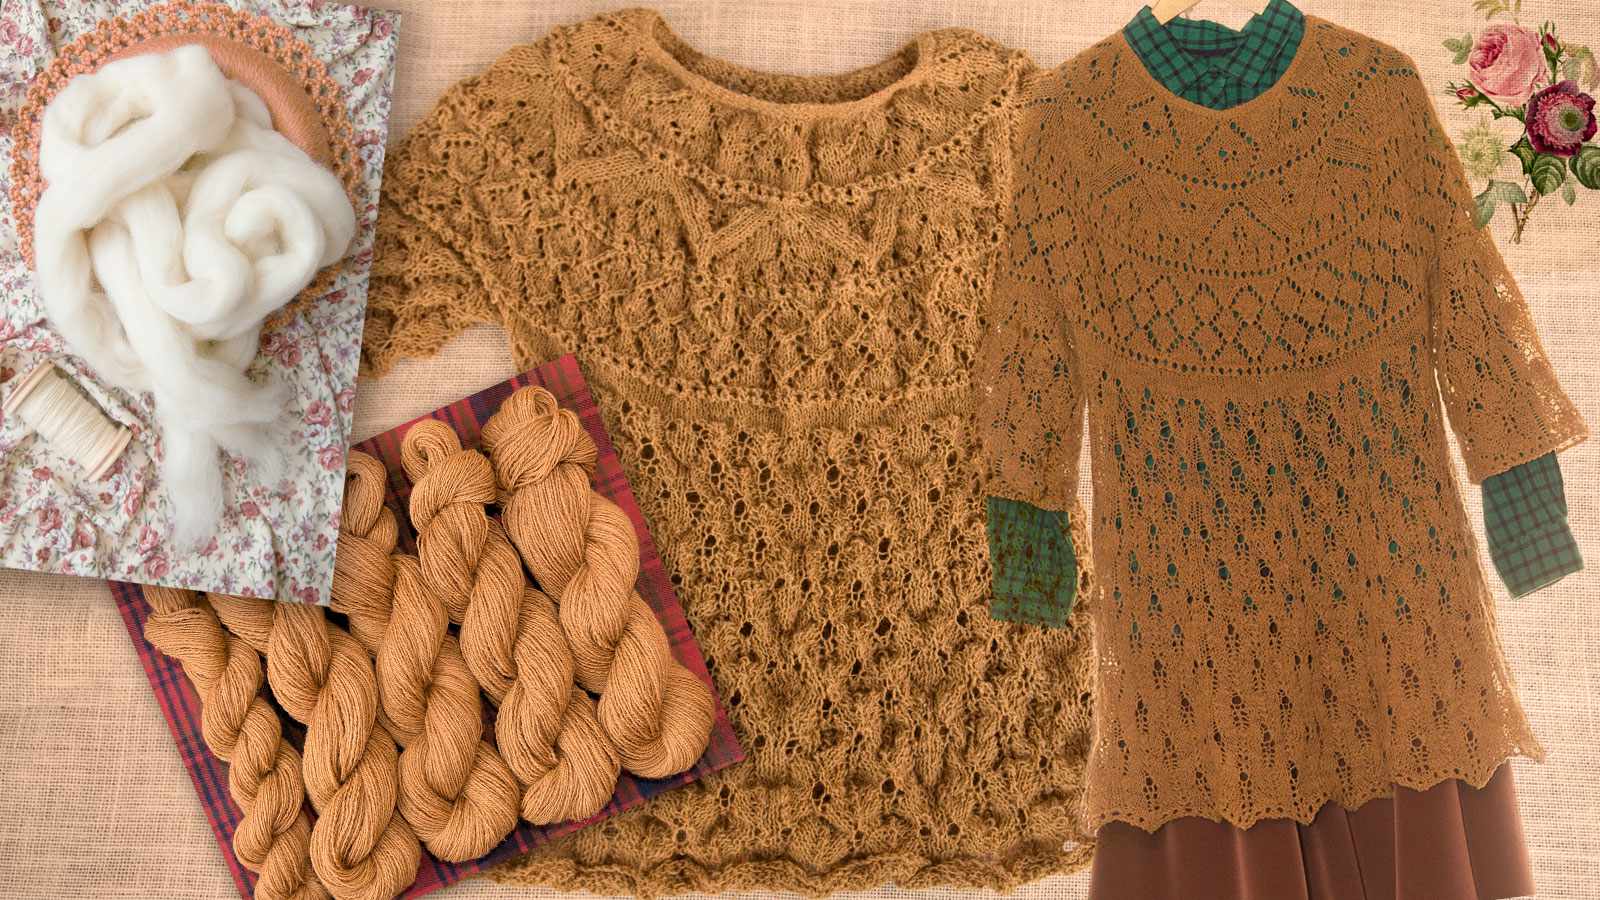
But, I was excited to embark on my new wool craft endeavor. To give you a sneak peak of my lace tunic project, I made the picture montage below.

Starting my Lace Tunic Project
My project began with a trip to the local yarn store for a quick purchase of some fleece for the spinners guild meeting. I bought a pound of off-white roving consisting of wool from 57 different sheep. With that roving and my travel spinning wheel, I rushed to my guild meeting.

Gosh, I can’t tell you how much I enjoyed my spinner’s guild back in Kentucky! I made so many friends and learned a lot. Ah, I really miss my Kentucky guild!
I arrived to the meeting and set up my Lendrum portable spinning wheel. All yarn spinners bring their wheels and arrange them in a large circle. That way, we can all see what other crafters are working on, share tips and ideas, joke and socialize while having refreshments. I hope, you guys are back to your gatherings after the pandemic.
Spinning the Wool into Yarn
So, having everything setup, I decided to spin very fine yarn for my lightweight gossamer pullover for that exceptionally warm winter month.

After the meeting, I finished the rest of my project at home in a few days. It was surprising to me to learn how long it took to spin just one bobbin when the yarn is so fine!
When spinning yarn, the general recommendation is to keep it on the bobbin for 24 hours to let it rest and set in the twist. I as a diligent spinning student, I followed this recommendation and waited impatiently until the next day. My spinning instructor would be so proud!
The next step after spinning is plying. To ply the yarn, you need to spin two or more fibers in the opposite direction. This way, the yarns literally wind on each other. The opposite spin allows to slightly loosen the torque by unwinding the yarn. I made a two-ply yarn to make sure it is still very fine for my gossamer tunic.
The Niddy Knoddy Winding and Singing
Following my usual routine, I transferred the spun and two-plied yarn from the bobbins into skeins using a hand reel with a bucolic name “niddy noddy”. (Some people call it knitty knotty, but it’s actually niddy-noddy). Back in old days, women and children used to sing the niddy noddy song while winding their yarns into hanks.

The Yarn Makeover
The next steps in yarn preparation for knitting are dyeing and washing. Since my yarn was almost white, I could used any color I desired. As with all other fibers I produce, I use only pigments derived from nature. This time, I found the natural dyes right here in my back yard.
The carpet of fallen autumn leaves transformed the forested countryside into a cinnamon-colored landscape. The bright patches of terrain found under the hickory trees are especially attractive.
We collected a few pounds of dry hickory leaves for me to dye my yarn. Dying with natural pigments has an element of surprise as one never knows what exact color, tone, or shade to expect. I could hardly wait to see the final color. To my great surprise, the result exceeded my expectations. I was very happy with this rich golden-brown hue.

I am finally ready to wind my washed and dyed yarn for knitting. Whew!
My Lace Tunic will be One Big Swatch of Elaborate Patterns
I have a large collection of intricate and intriguing lace knitting patterns. The patterns by themselves are very elaborate and pretty. I decided to go even further and combine some patterns into a three-dimensional garment. My elaborate lacy needlework required a little bit of calculations, but it wasn’t too bad at all.
My lace tunic project was kind of an experiment combining gossamer patterns. Two things I knew for sure. first of all, I wanted a round yoke and three-quarter sleeves. Everything else was pretty much a free form.
After making a small stockinette swatch to measure the knit gauge and a little counting, I made my “Hickory Gossamer Tunic”. Because of not knowing the final result and going with the flow so to speak, the making process became very gratifying to me.
Quite often when knitters finish their work, they stop there. However, there is one more step to do to make your garment looking neat and professional. This step is called blocking. The blocking can be done in many different ways. Perhaps, I’ll write an entire post just on that. So, let’s see how I blocked my lace garment this time.
Blocking my Handmade Lace Tunic
Before the Block
As you can see from two pictures below, the lacy pattern makes the newly created knit fabric look very corrugated.

The pattern that I selected for the bodice has even more relief. In fact, the shape looked to me like an egg carton while in the making.

Obviously, some knitted projects have a purpose of being scrunched like this. It all depends. But I wanted my tunic to be more flat. For this project, I decided to wet-block followed by a steam-block.
Soaking the Garment in Water
For wet blocking, I completely immersed the tunic in water. When it was fully saturated, I pulled it out and squeezed most of the water very gently and trying to avoid any wringing. Then, I laid the tunic onto a thick towel and rolled it in like a burrito. An additional squeezing of the towel burrito moved a large portion of the water from the garment into the towel.
Spreading and Pinning the Tunic on the Blocking Table
After this process, the tunic stayed pretty wet, but not dripping. I placed my tunic onto a special blocking table. The markings on the table surface help spread out the garment as symmetrically before setting it in a permanent shape.

The tunic in the picture isn’t just lying on the table. I use special pins and wires to shape the neckline, the sleeves, the sides, and the “teeth” of the hem. This is quite an elaborate process, but it’s done only once. You don’t need to pin and block your knit wool garment after each wash.
Steaming and Ironing the Wet Tunic to Set the Texture
The final step in blocking is to fix this shape to make it permanent. I used the iron that I floated at about half-an-inch from the pullover. This this distance from the iron plate provides enough heat to set the fibers in the pattern without pressing them leaving some texture, but making the garment more manageable during wear.
When the tunic eventually dried on the blocking table, I still wanted it a little more flat. This time, I simply steamed it with the steam iron without touching it. You can touch your garment with hot iron. But this will block it into a very flat garment permanently. This type of blocking is called “killing”. Killing can give you very nice result if desired.
The Result
My lace tunic turned out to be very nice, lightweight, and comfortable. I like the shape, pattern, color, and overall design.
