
Table of Contents
- What is a crochet cast on?
- The Process:
- Step 1. Set up your knitting machine.
- Step 2. Crochet cast on: cast the yarn on the needles with a crochet hook or a latch tool.
- Step 3. Thread the yarn through the yarn feeder of the carriage.
- Step 4. Knit the first row by moving the carriage across the needles to the left.
- Step 5. Attach the cast-on comb to the work and knit as usual.
- Crochet cast-on edge looks like a braid.
What is a crochet cast on?
Crochet cast on is a very simple way to create a neat and professional border of your work on a flatbed knitting machine. The border looks like a braid rather than a rope. A crochet hook or a latch tool can be used for this cast on, thus the name, crochet cast on.
In this tutorial, you will learn two ways to do a crochet cast on. I am using a crochet hook for this tutorial.
Let’s go!
The Process:
Step 1. Set up your knitting machine.
Prepare the needles: push the needles into the holding position.
As usual, the first step is to engage the working needles. For this exercise, select 30 needles. They become your working needles. Use the blunt edge of the needle pusher to move the working needles into a holding position (all the way forward). (D position on Singer/Studio, E position on Brother/Knitking.)

Prepare the carriage: place the carriage to one side of the working needles with the holding cam lever in the normal position.
The carriage can be on either side* of the working needles.
* Usually, the carriage is on the right for the right-handed person and on the left for a left-handed person. In this tutorial, the carriage starts on the right.
In this tutorial, you will see two methods of crochet cast on. With the first method, the cast on starts at the opposite side from the carriage. With the second method, the cast on begins on the same side as the carriage. The working yarn, however, always ends up on the side of the carriage.
If the carriage ends up on the wrong side somehow, you can switch the holding cam lever to the holding position and move the carriage to the other side. Another way to do it is by removing the carriage all the way out of the machine and inserting it on the correct side. The nice thing is that you don’t have to remove your stitches from the needles.
Step 2. Crochet cast on: cast the yarn on the needles with a crochet hook or a latch tool.
Method 1.
Begin with a slip knot on the crochet hook.
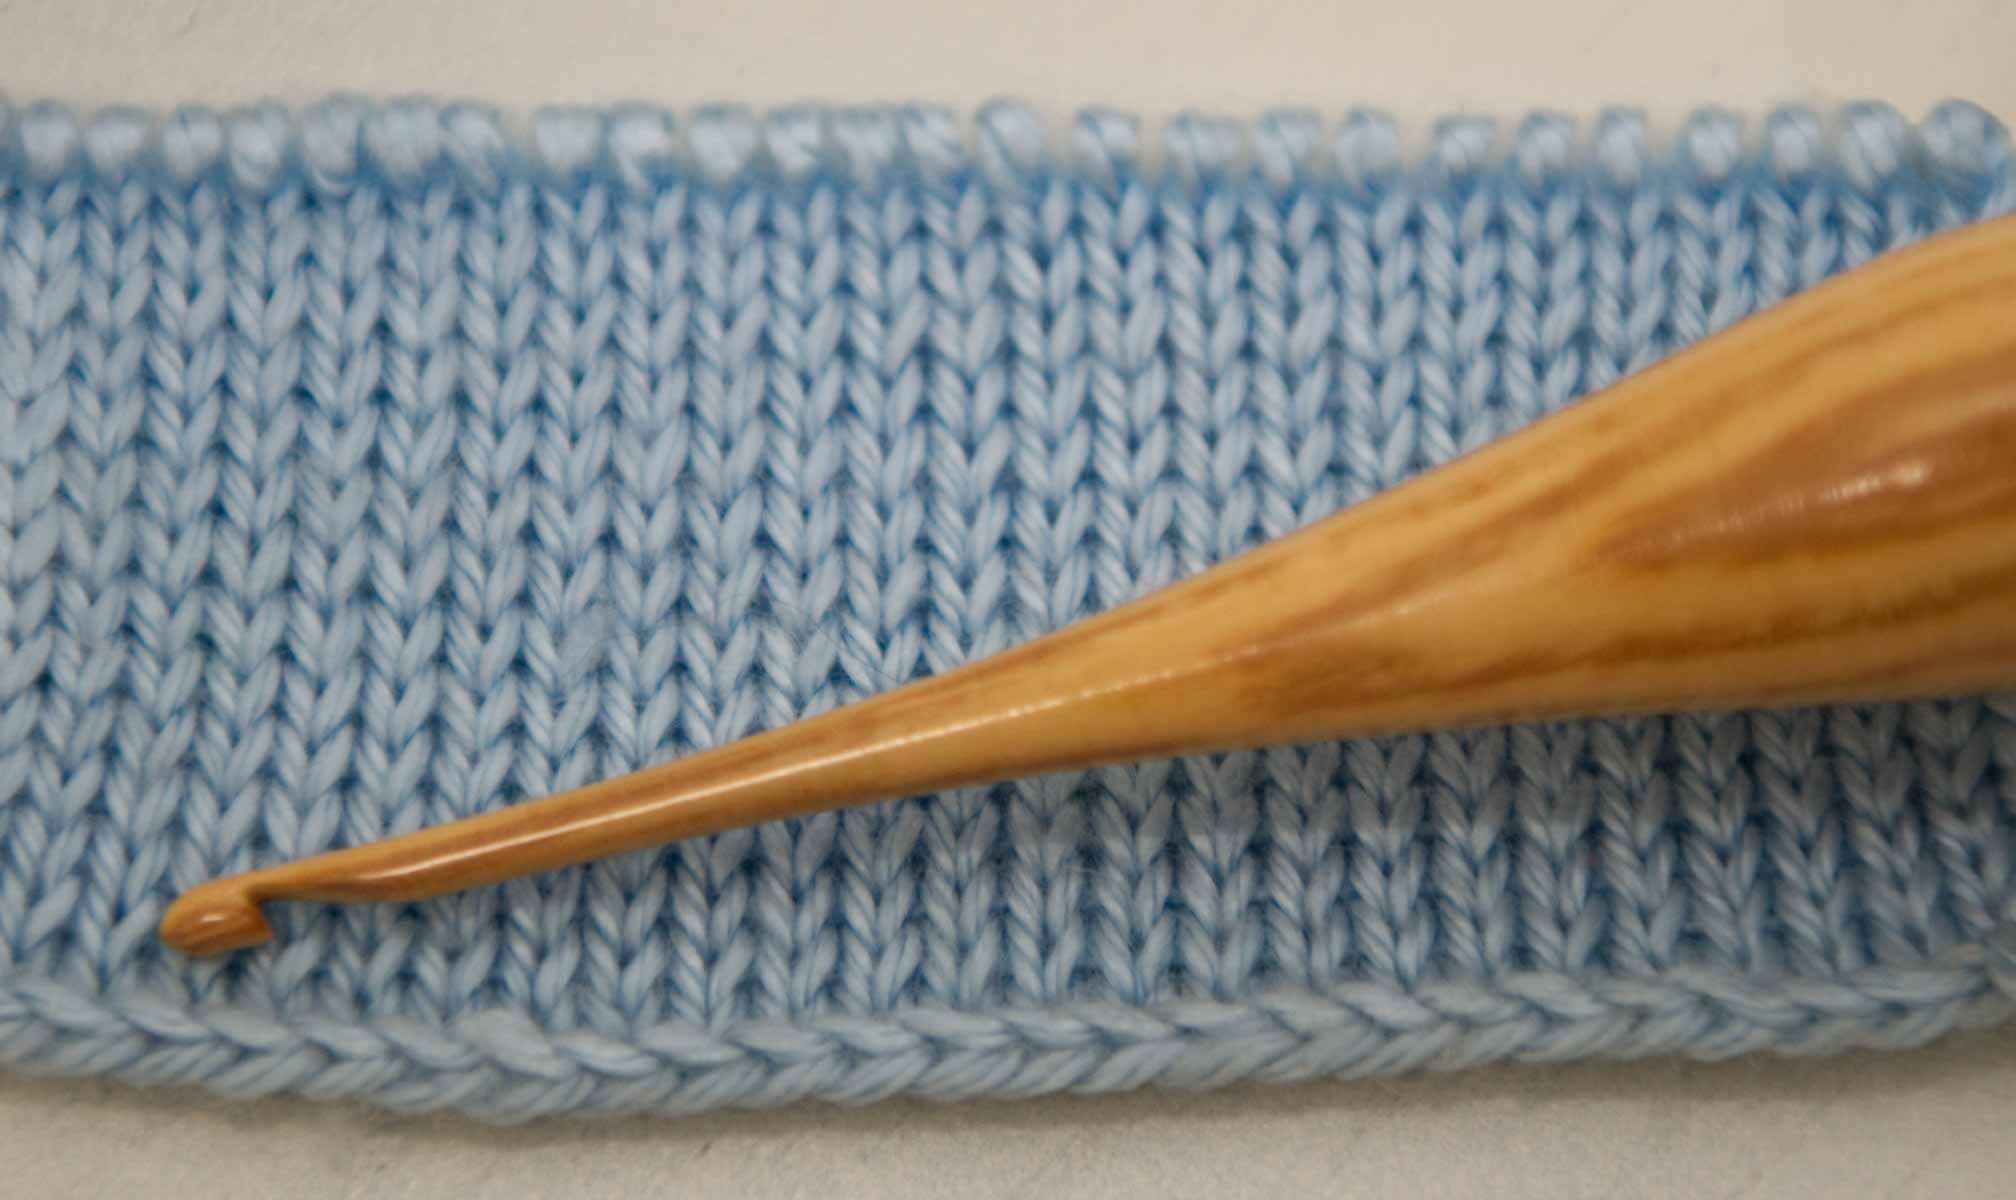
Let’s begin the cast on. Make a slip knot around the crochet hook (or a latch tool). Insert the hook between the first and second working needles on the opposite side from the carriage, just like in the photo below. Use your right hand to hold the crochet hook and your left hand for the yarn.

Start crochet cast on by making a chain with each stitch wrapped around each needle.
Reposition your left hand so that the working yarn is above the needles and in front of the crochet hook.

Use the hook to slip the yarn through the slip knot below the needles.


Pull the yarn down through the next loop.

Next, move the crochet hook upwards between the adjacent set of two needles.

Keep going in the same fashion until you reach one needle before last.
Wrap the yarn around the last needle.
When you reach the last needle, slip the yarn down between the last two hooks and cast the last loop onto the last needle.

The next picture shows better the last stitch and the yarn behind it.

Method 2
You will need a crochet hook and a transfer tool.
Make a chain using a crochet hook with the number of stitches equal to the number of working needles.
This fabulous set of crochet hooks is made of Sorbus or mountain ash. Aren’t they beautiful!? They are also very ergonomic and easy on your hands. And they create very uniform stitches.

Make a chain using a crochet hook. Make sure, it is reasonably loose.
The crochet chain looks like a braid on one side.

And it looks like a chain on the other side.

Place the last stitch onto the last needle with the working yarn on the side of the carriage.
Normally, a cast on starts on the opposite side of the carriage and moves towards it. This cast on is unique with this respect. It starts on the same side as the carriage with the last stitch looped around the last needle. by doing this, the working yarn stays next to the carriage.
The first step is to loop the last stitch onto the last needle with the working yarn behind the stitch. With the carriage on the right side the cast on starts on the right with the last loop of the chain. So, the working yarn is on the right side as well.

Move the chain links from right to left onto the needles with a transfer tool.
Next, use a transfer tool to move the chain links onto the needles from right to left

Below is a close-up photo of the transfer tool threading through the stitch and hooking onto a needle tip.

Transfer the chain loops one at a time. The braid side of the chain stays out.

When all stitches are transferred, you can thread the carriage and start knitting as usual.

Pros and Cons of Method 2.
This method has its pluses and minuses.
The plus is that if you have a tendency to over-tighten your cast on, this will help you avoid the problem by using a large enough crochet hook to make a chain that is relatively loose.
The negatives are, first, it takes a little longer because you have to prepare the chain separately; and second, it’s easier to make a mistake and skip a needle just like I did. Do you see a skipped needle in the photo above?
Step 3. Thread the yarn through the yarn feeder of the carriage.
Whether you used the first of second method, the crochet cast on is accomplished. Now you can knit your project.
Run the working yarn under the carriage and through the yarn feeder. Close the yarn feeder. The holding cam lever is in the normal position. The needles are in the holding position.

Step 4. Knit the first row by moving the carriage across the needles to the left.
Below is the first row created by moving the carriage to the left.

Step 5. Attach the cast-on comb to the work and knit as usual.

Knit as usual.

Crochet cast-on edge looks like a braid.
I put my swatch onto a hand knitting needle for this demo and blocked the sample with a steam iron to demonstrate the border created by a cast on with a crochet hook. As you can see, this border looks a lot like a braid similar to that of a manual cast on or bind off.

I hope, you found this tutorial helpful.
Blue Cat is really tired after all this work. Whew!
